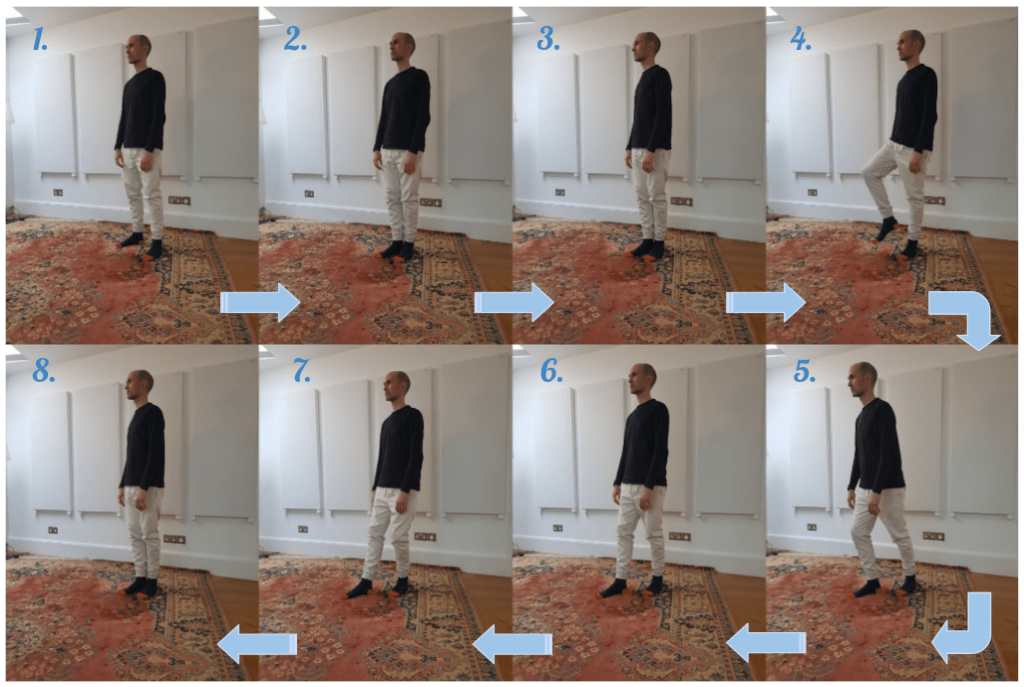
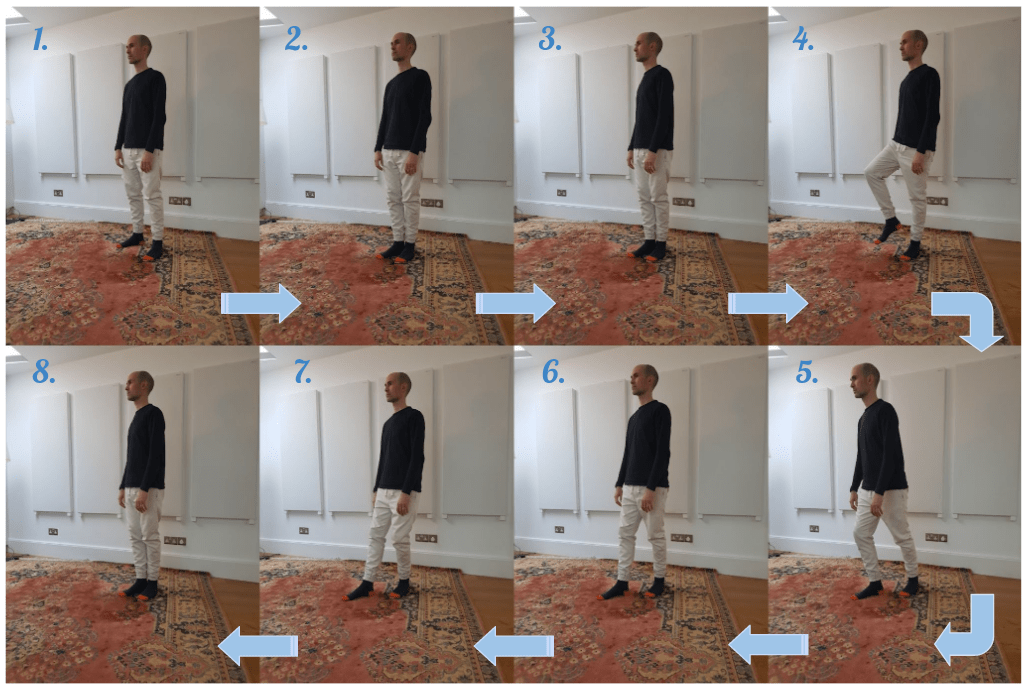
Going into a ‘lunge’ is something we explore in the Alexander Technique. The idea is simple: let’s move down to a slightly lower level but without interfering in the head-neck-back relationship, or what Alexander calls the ‘primary control’. Or, to put it another way, can I leave my spine long while bending freely at the hip, knee and ankle joints? There are lots of applications such as writing on a high desk, picking a baby up from a changing unit or emptying the top shelf of the dishwasher.
In Alexander lessons, we learn the lunge by breaking it up into a number of steps. This is so that we can establish the best possible use of ourselves along the way. The lunge is merely the ‘form’, and unless we are attending to our use along the way it is not the Alexander Technique.
What does it mean to attend to our use? It means to inhibit and direct, and here is a useful visual summary of this for the uninitiated (and indeed for the initiated).
Below is my explanation of the lunge procedure.

1. stand with feet hip width apart.
inhibit and direct
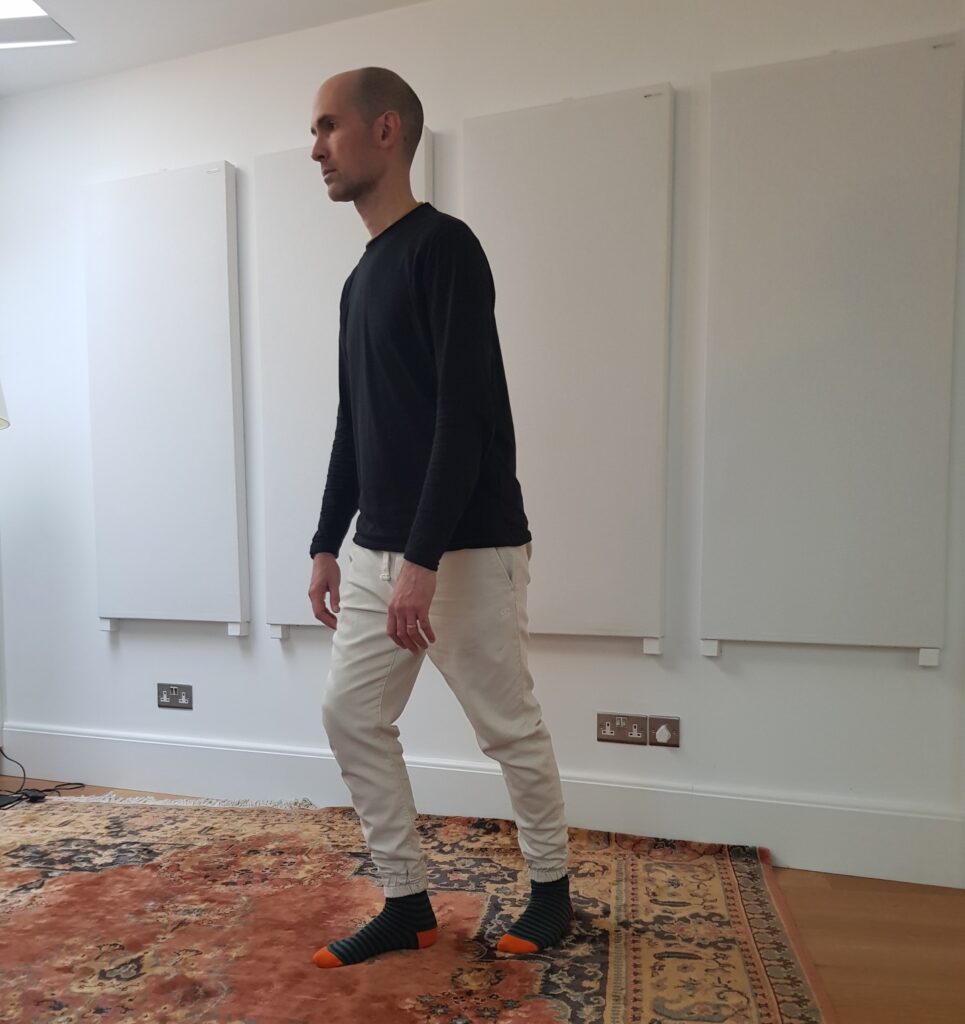
2. place your right heel in the hollow of the left foot at an angle of roughly 30°.
inhibit and direct
3. twist slightly so that you’re facing the direction of the right foot. The whole of the back can feel satisfyingly ‘square on’ to the right leg.
inhibit and direct
4. bring all your weight onto your left leg and lift your right knee. (Your right lower leg should be completely free of tension. If necessary, swing the lower right leg at the knee a little and shake out the ankle.)
inhibit and direct
5. Drop over onto your right leg while keeping your left leg straight. You’re not ‘stepping forward’ with the right foot, but keeping the right lower leg loose at the knee joint. The distance between the two feet is quite small. Arms should hang loosely at your sides, and gravity will help widen your shoulder blades at the back if you let it. There is a satisfying line all the way from the back of the head to the left heel.
inhibit and direct

6. Now straighten both legs, distributing your weight evenly on the feet.
inhibit and direct
7. Keeping the right (front) leg straight, now bend the left (back) leg. It is an unusual stance and you can feel like you’re sitting on the back leg.
inhibit and direct
8. Reverse through steps 6 and 5, and finally push off with the right (front) leg so that you end up at step 3 again.
You can cycle forward and back through steps 5, 6 and 7 a few times and also miss out the intermediary step 6 so that your movement flows from a bent back leg to a bent front leg. A point of a light at, say, your ear would draw a satisfying arc, and when your Alexandrian directions are going well you will have the sensation of going ‘up and over’. You can ‘think up’ to go over, and ‘think up’ to go back.
Now swap legs and repeat. One side will always be easier than the other.
The great thing about familiarizing yourself with the lunge is that you will start catching yourself using it in various situations. This is a surefire sign that your study of the Alexander Technique has begun to have a positive impact on your overall use and functioning.

